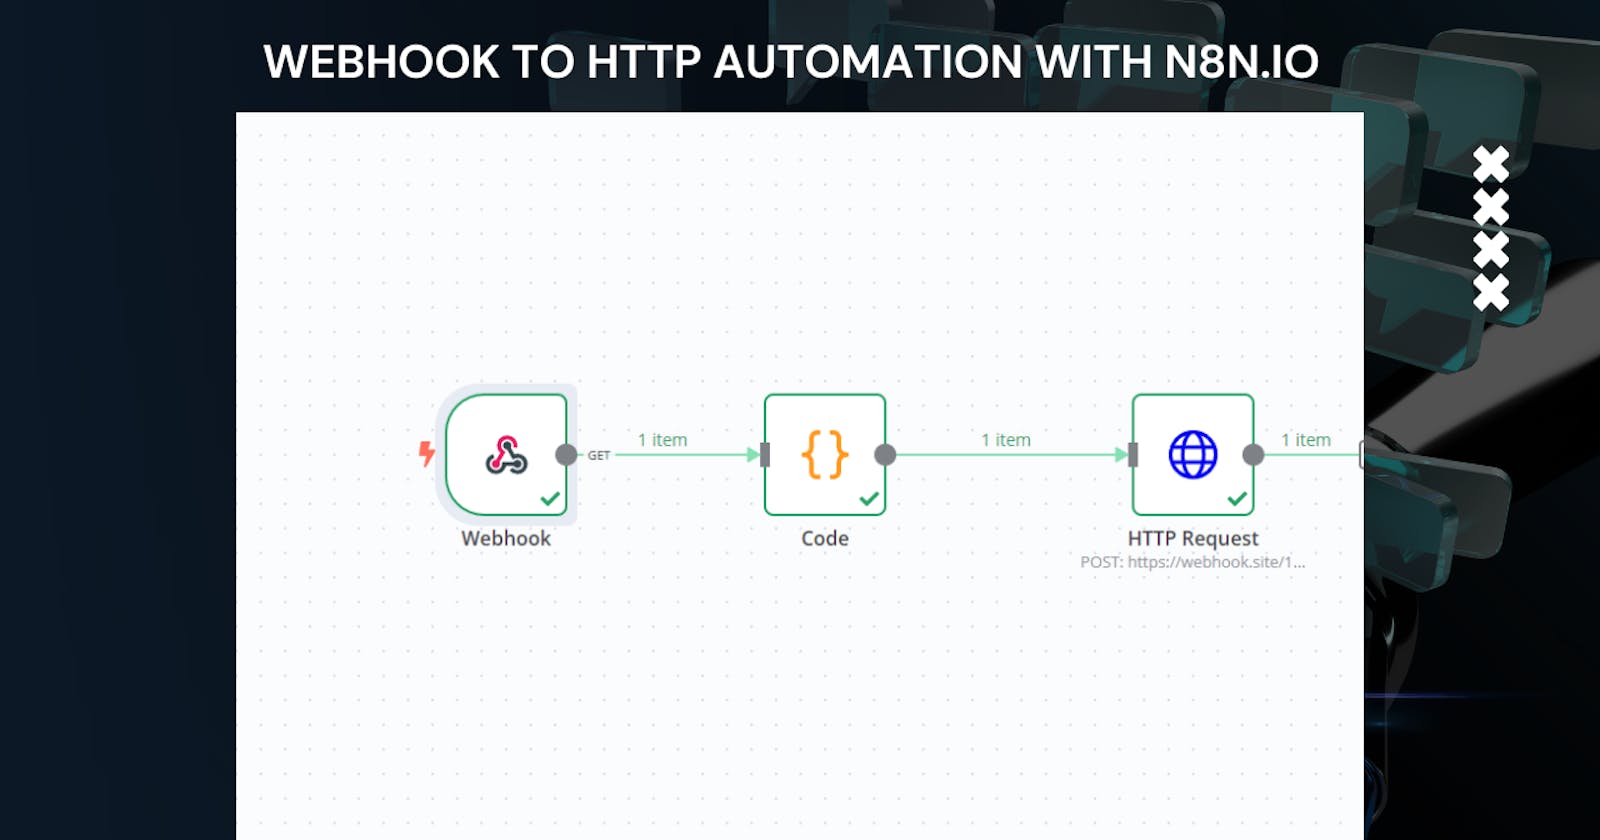


Here's a step-by-step process for building an automation workflow in n8n.io using a webhook node, a code node, and an HTTP request node:
1. Setting Up the Workflow:
Open n8n and create a new workflow.
Give your workflow a descriptive name, like "Portfolio Data Processing."
2. Webhook Node:
In the workflow pallet, search for "Webhook" and drag a "Webhook" node onto the workspace.
Double-click the "Webhook" node to configure it.
URL: Define the URL where you want to receive data from your portfolio platform I use postman for this process and I used the testURL given in n8n
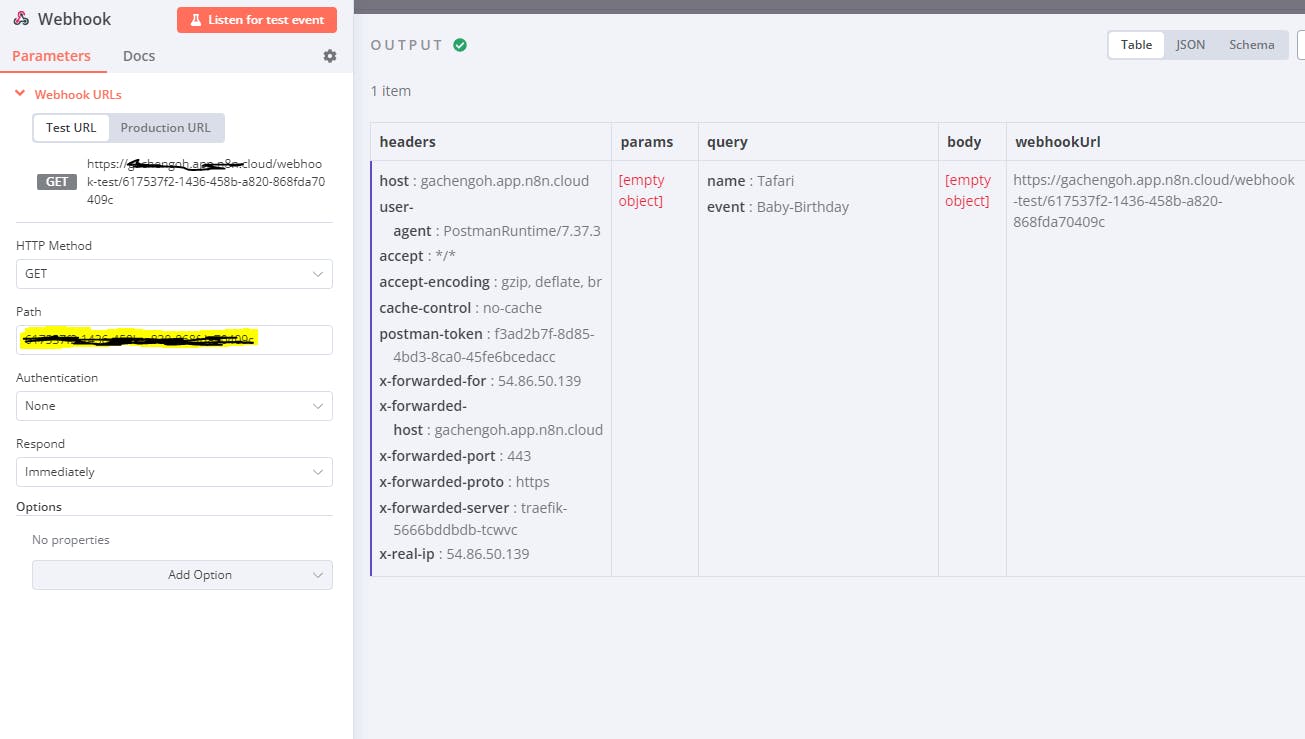
Method: Select the HTTP method used by your portfolio platform to send data (usually GET). This information should also be documented by your portfolio platform.
Path: (Optional) Specify a path within the request body if your data is nested within a specific path. For me, The path is autogenerated on n8n
3. Code Node:
Drag a "Code" node from the pallet and place it after the "Webhook" node. Connect the output of the "Webhook" node to the input of the "Code" node.
Double-click the "Code" node to configure it.
Code: Here, you'll write the code to manipulate the received data. You can use JavaScript or python for this purpose. For my case, I just wanted t transform the data, I received to a sentence:

Access the received data using the
itemobject.The specific code will depend on how you want to alter the data. Common operations include:
Extracting specific data fields.
Formatting data (e.g., dates, names).
Filtering or transforming data based on your needs.
JavaScript
for (const item of $input.all()) {
  item.json.myNewField = `hey ${item.json.query.name}, have fun at the ${item.json.query.event}`;
}

return $input.all();
4. HTTP Request Node:
Drag an "HTTP Request" node from the pallet and place it after the "Code" node. Connect the output of the "Code" node to the input of the "HTTP Request" node.
Double-click the "HTTP Request" node to configure it.
Method: Select the HTTP method required by the server you want to send the data to (likely POST).
URL: Define the URL of the server where you want to send the processed data.I used webhook.site as the location to send the data to.
Body Type: Choose how you want to send the data (e.g., JSON, form-data). This should match what the receiving server expects.
Body: Here, you'll define how to include the processed data in the request body. You can use the
itemobject again to access the modified data.Example: (assuming you want to send the entire modified
item.jsonobject)
JSON
{{ item.json }}
5. Deploying the Workflow:
Once you've configured all the nodes, click the "Deploy" button in the top right corner of the workflow editor.
n8n will validate your workflow and let you know if there are any errors.
If there are no errors, your workflow will be deployed and ready to receive data from your portfolio platform.
Additional Notes:
Make sure you understand the data structure of the information received from your portfolio platform and the format expected by the receiving server.
Test your workflow thoroughly with sample data before using it with live data.
Consider using n8n's built-in debugging features to inspect the data at each stage of the workflow during testing.
By following these steps, you can create a basic portfolio automation workflow in n8n.io that receives data from your portfolio platform, modifies it using code, and then sends the processed data to another server. Remember to adapt the code and configuration based on your specific needs and the requirements of your portfolio platform and receiving server.